Deployment feels intimidating the first time because it introduces new moving parts: GitHub, build commands, and something running outside your laptop.
This guide is intentionally simple: follow these steps and you’ll end with a live public URL serving your Flask app on Render’s free tier.
Deploy your Flask app on Render in 9 steps
-
Create a new GitHub repo
Create a repository for your Flask app and push your code to it. Render will deploy from this repo.
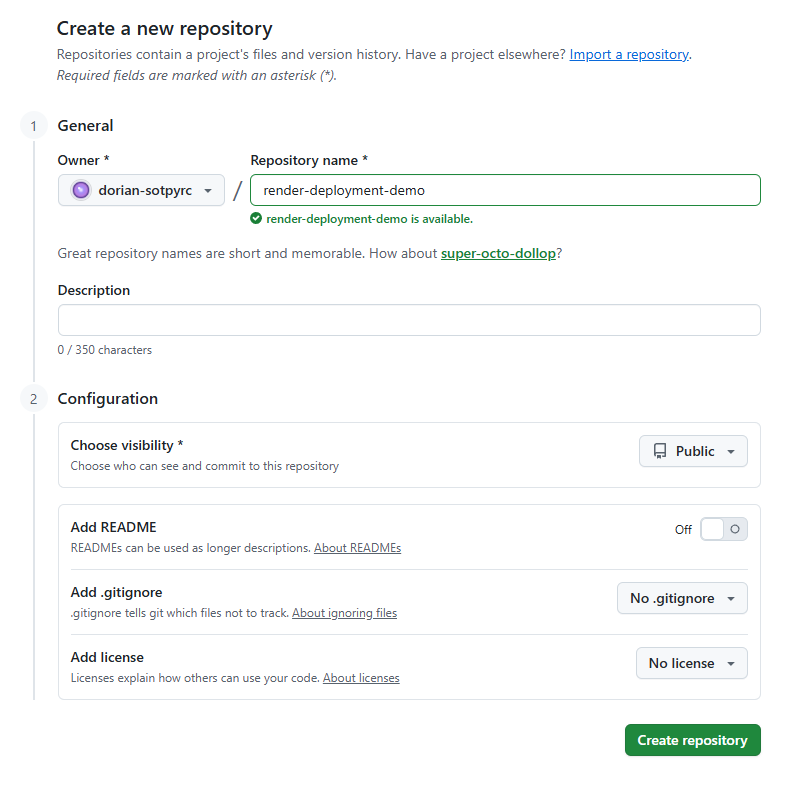
Create a new repository on GitHub for your Flask app. -
Ensure you have a correctly configured render.yaml
render.yamlis the recipe Render uses to build and start your app. If this file is missing or the start command doesn’t match your code, the deployment will fail.For this guide, we use the simplest and most reliable pattern: a single
app.pyfile that exposes a top-level Flask object namedapp, started withgunicorn app:app.YAMLservices: - type: web name: render-dashboard-demo env: python plan: free buildCommand: "pip install -r requirements.txt" startCommand: "gunicorn app:app --bind 0.0.0.0:$PORT"What to double-check✓ buildCommand installs dependencies from
requirements.txt✓ startCommand matches your entrypoint —
app:appmeans “importapp.pyand use the Flask object namedapp”✓ The app binds to
$PORTso Render can route traffic correctlyThe #1 deployment mistakeDon’t mix patterns. If your start command uses
app:app, your code must defineapp = Flask(__name__). If you use an app factory likecreate_app(), your start command must use the factory form. -
Log in to Render using GitHub
Log in at render.com and authenticate using your GitHub account so Render can access the repository you created in Step 1.
-
Create a new Web Service
In the Render dashboard, click New and choose Web Service.
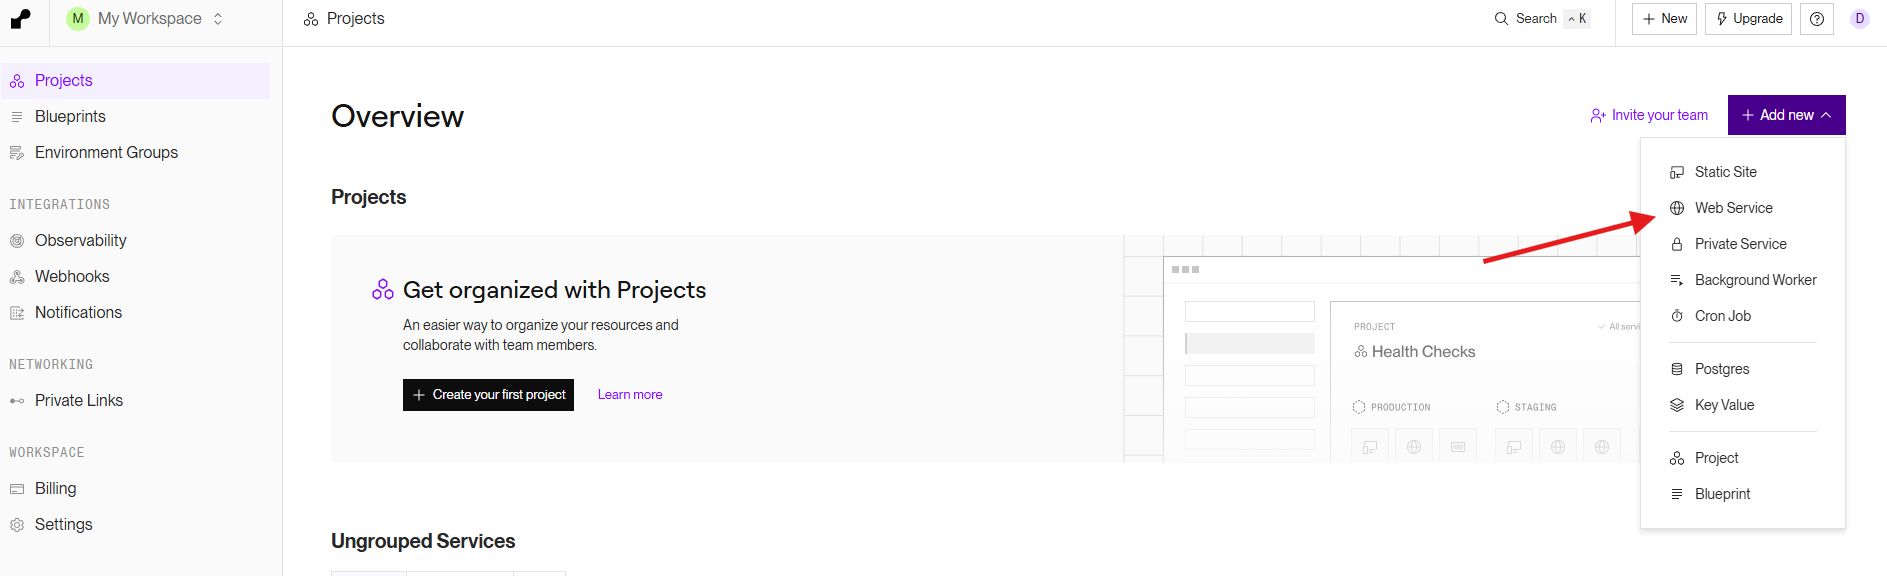
Create a new Web Service on Render. -
Select and connect your GitHub repo
Choose the repository you created in Step 1 and connect it to Render.
-
Leave defaults and ensure Free tier is selected
Leave the defaults as-is and confirm the instance type is set to Free. This is plenty for learning, demos, and small hobby projects.
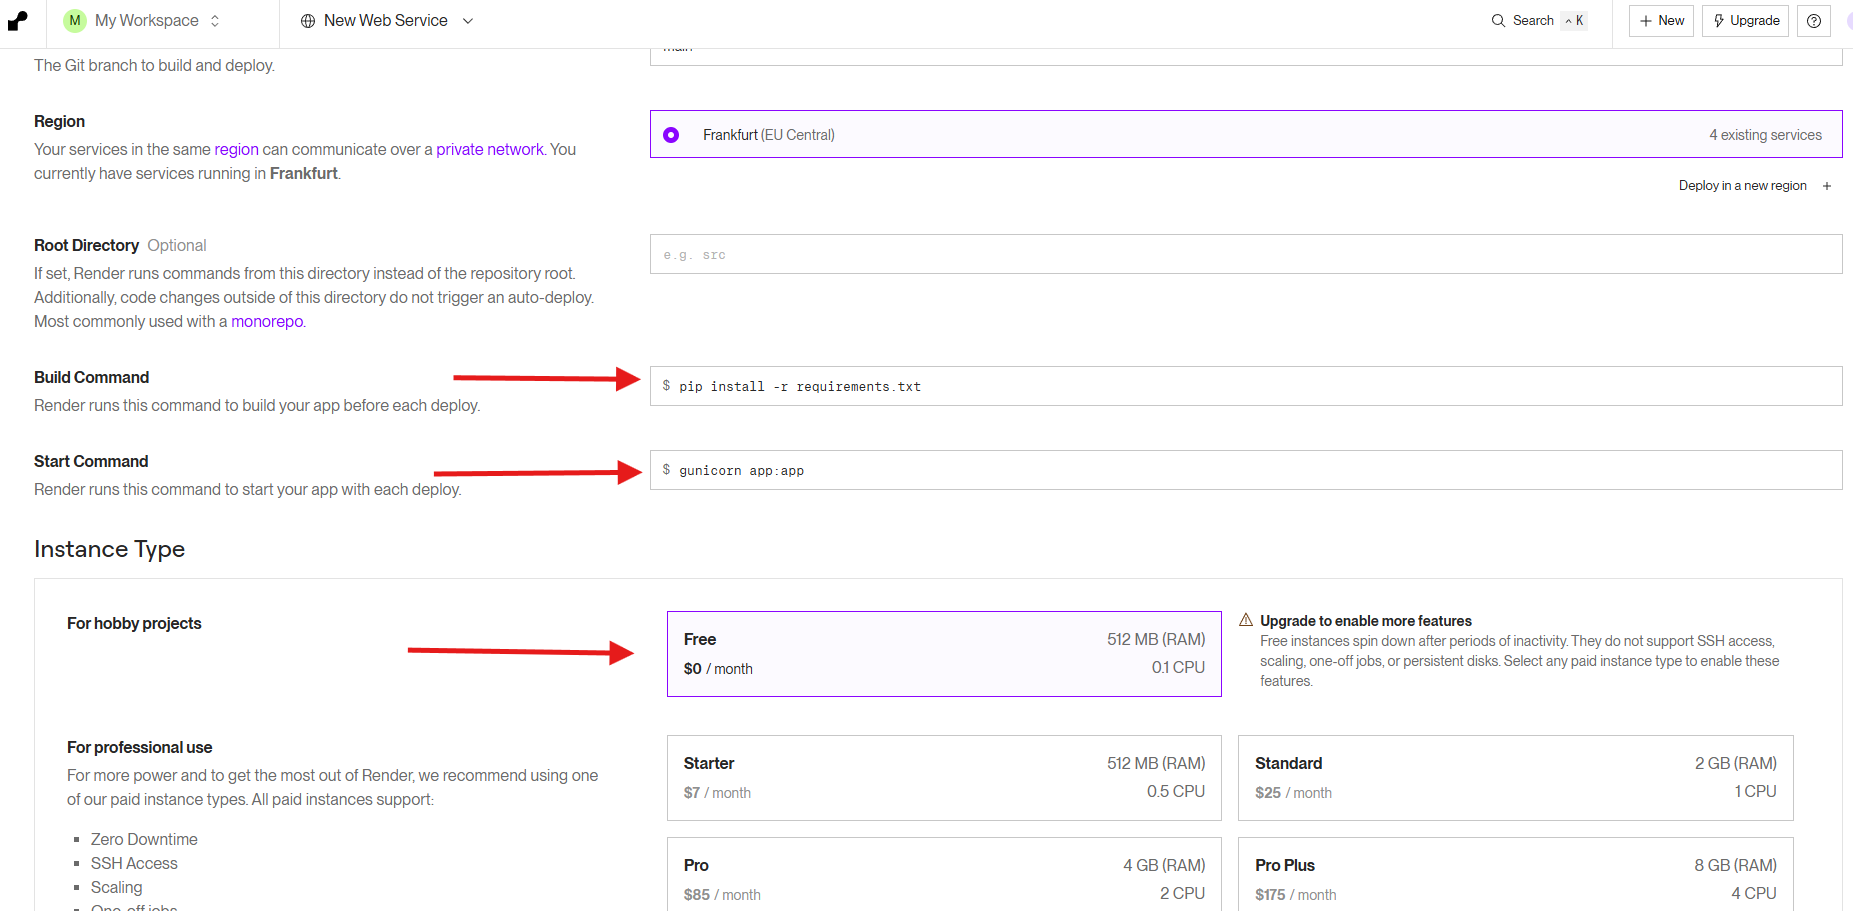
Connect the repo and confirm the Free tier is selected. -
Watch the build start and confirm there are no errors
Render will kick off the first build immediately. Watch the logs and look for a clean run: dependencies install, Gunicorn starts, and there are no red stack traces.
If you hit issues, check these two things first:
Quick checks✓ Check 1: Did the application run locally without errors?
✓ Check 2: Does your
render.yamlstart command match your app entrypoint (for this tutorial:gunicorn app:app)?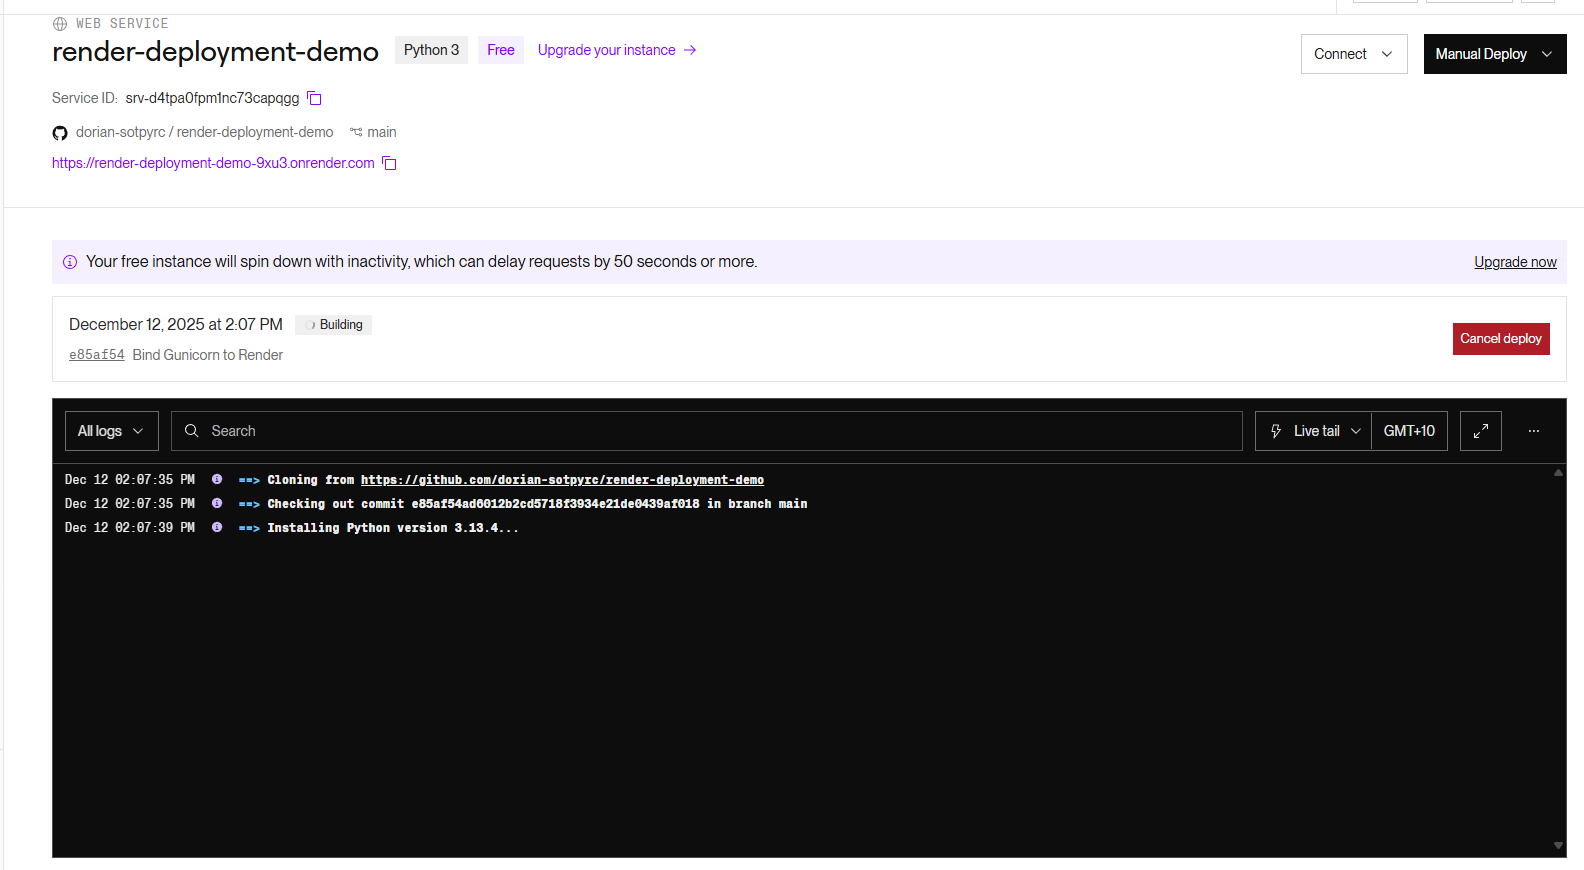
Watch the build logs and confirm there are no errors. -
When it says Live, open the public URL
When Render signals Live, your app is running publicly. Open the URL Render provides and confirm your site loads.
This is the moment your project becomes real: it’s live on the internet, not just on your laptop.
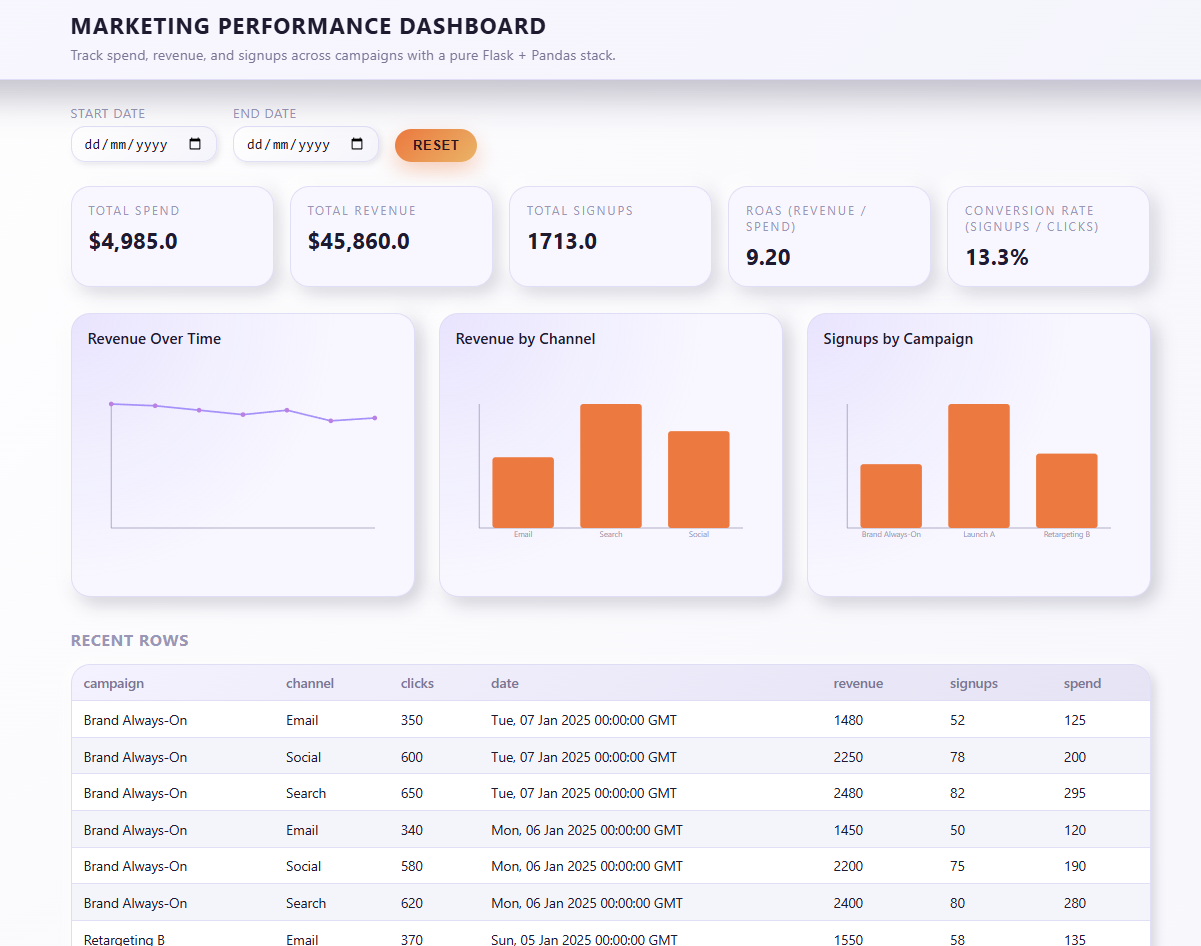
Your service is Live — open the URL and view your public site. -
Share the link with your friends
You now have a real public deployment. Send the link to someone else and enjoy the fact it works outside your laptop.
The repo used in this walkthrough:
https://github.com/dorian-sotpyrc/render-deployment-demo
Clone it and deploy your own copy.
Related PLEX reading
References & further reading
-
Deploying Flask on Render
Official Render documentation for deploying Flask apps. -
Render Blueprint (render.yaml) spec
Howrender.yamlworks and what fields you can configure. -
Gunicorn documentation
Background on Gunicorn and how WSGI servers run Python web apps in production.